 EN
EN DE
DE
 Update 01/10/2023: This article now has only historical value. "The way to go" today is the official Docker install:
https://github.com/steve-community/steve
Inspired by a thread on Goingelectric I build a Raspbian image with the wonderful SteVe OCPP server.
The idea was to create an "out of the box" solution for the not so IT related private charging station owners. Just to play a bit with their Keba or other OCPP ready charging stations.
I'm not planning to create further updates on this image. It is an image to play with for private use.
Update 07/15/2021: Every now and then a friendly and very understandable update request reaches me. But I'm sorry to have to say, that a new Raspi/Steve inmage is not planned by me.
Short documentation - SteVe 3.0.2 on Raspbian 9 – 09/30/2018
SteVe is an open source OCPP server. I.e. Keba charging stations for electric vehicles can communicate with SteVe. The SteVe server can i.e. create charging logs, manage charging processes and reboot charging stations remotely.
https://github.com/RWTH-i5-IDSG/steve
Raspbian ist the Debian Linux operating system for the mini computer „Raspberry Pi“.
https://www.raspberrypi.org/downloads/raspbian/
The here documented system uses Raspbian Lite 9 without gaphical user interface. As hardware a „Raspberry Pi 3 Model B“ with a 16 GB SD card is used.
1. Installation
Prior to installation you need to download the compressed image steve_raspi_image270918.gz from below this page. Then you can install the file with a Linux system as „root“ with the command
gzip -dc /pfad_zum_ordner/steve_raspi_image270918.gz | dd bs=4M of=/dev/sdb
to a 16 GB (mandatory size) SD card. Implied that the SD card is /dev/sdb.
Please check carefully that the SD Karte really is /dev/sdb with the command „lsblk“. Otherwise dramatic data loss can be the result!
Alternativly you can uncompress the steve_raspi_image270918.gz file (under Windows i.e. with the free software 7zip) and then install the image on the SD card as recommended: https://www.raspberrypi.org/documentation/installation/installing-images/
After the installation the SD card can be put into the Raspberry Pi.
2. Starting the system
The Raspberry Pi should be connected to a switch with a network cable. The connecting with a HDMI cable or a keyboard is not necessary. The power supply must be connected with the Pi. Now plug in the power supply to the socket and the Pi will boot. The booting process itself is fairly quick. The automatic start of the SteVe server process takes a bit more time. But about 1 minute after the start of the systems the SteVe server should be up and running.
3. Administration of the SteVe server
For the administrative access to the SteVe server you need to enter the following URL in a browser on a computer within the same network as the Pi (192.168.1.x)
http://192.168.1.69:8080/steve/manager/home
Username is admin. Password is keba12
To connect a charging point to the SteVe server, the SteVe documentation says:
Add a charge point
In order for SteVe to accept messages from a charge point, the charge point must first be registered. To add a charge point to SteVe select Data Management >> Charge Points >> Add. Enter the ChargeBox ID configured in the charge point and confirm.
The charge points must be configured to communicate with following addresses. Depending on the OCPP version of the charge point, SteVe will automatically route messages to the version-specific implementation.
SOAP: http://<your-server-ip>:<port>/steve/services/CentralSystemService
WebSocket/JSON: ws://<your-server-ip>:<port>/steve/websocket/CentralSystemService/<chargeBoxId>
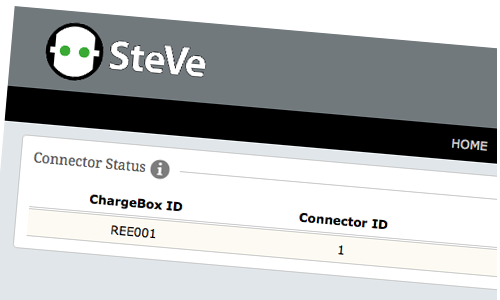
As soon as a heartbeat is received, you should see the status of the charge point in the SteVe Dashboard.
This means for our system, that within a Keba charging station these entries need to be provided:
Chargepoint Identity: the ChargeBox ID, entered into the SteVe Data Management for registration.
Central System Address: http://192.168.1.69:8080/steve/services/CentralSystemService

Keba's can also communicate encrypted over the OCPP protoocol. Our system is prepared for that. Within the Keba the certificate of the SteVe server needs to be installed. The file steve.crt (download also below) is needed therefor. This is not tested yet, as I don't own a Keba station. Feedback on this is very welcome. Keba’s can also communicate totally unencrypted with the SteVe server.
The SteVe server itself tells us these connection options:
Access the web interface using:
- http://192.168.1.69:8080/steve/manager/home
- https://192.168.1.69:8443/steve/manager/home
SOAP endpoint for OCPP:
- http://192.168.1.69:8080/steve/services/CentralSystemService
- https://192.168.1.69:8443/steve/services/CentralSystemServiceWebSocket/
JSON endpoint for OCPP:
- ws://192.168.1.69:8080/steve/websocket/CentralSystemService/<chargeBoxId>
- wss://192.168.1.69:8443/steve/websocket/CentralSystemService/<chargeBoxId>
It is recommended before starting with a real charging station, to test the system with a simulation
Therefor you can use a simple HTML file called „simple simulator1.6.html“ (download also below):
https://github.com/victormunoz/OCPP-1.6-Chargebox-Simulator
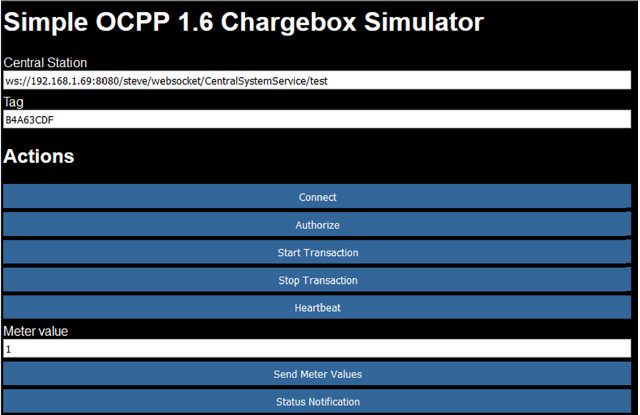
If you entered a Charge ID "test" into the Steve server, the URL within the HTML file under "Central Station" will be
ws://192.168.1.69:8080/steve/websocket/CentralSystemService/test
With a Charge ID „mybox“
ws://192.168.1.69:8080/steve/websocket/CentralSystemService/mybox
With this simulator processes like „Connect“, „Start Transaction“ or „Stop Transaction“ can be tested with the SteVe server.
4. Administration of the systems
The installation runs "out of the box". Normally there is need for administrating the system.
For those who nevertheless would like to try, these tools could be of interest:
https://www.putty.org/ (SSH remote console to the Raspi, encoding UTF8)
https://www.heidisql.com/download.php (Database frontend, port 3306)
https://winscp.net/eng/download.php (SCP file transfer from and to the Raspi)
http://www.pspad.com/de/download.htm (An editor)
Within the tools (appart from the editor) you can enter the IP address of the PI (192.168.1.69) and a username (root) and a password (keba12).
User on the pi are:
pi
root
„root“ is the system administrator with full access. „pi“ is a restricted user und will normally not be used.
For the MySQL/MariaDB database:
root
steve
For the web access to the SteVe server:
admin
All users use the same password:
keba12
Also the Java keystore in the folder /works/ uses that password.
Linux is case sensitive, so please mind capital / non-capital letters.
The default (cable) network settings are:
IP 192.168.1.69 (netmask 255.255.255.0)
DNS 192.168.1.1
Gateway 192.168.1.1
DHCP is not used. These settings can be changed in the file
/etc/dhcpcd.conf
All files relevant to the system are put as a backup into the folder /works/. There also residates the SteVe server itself and the Java keystore. Settings of the SteVe server can be edited within the file
/works/steve-steve-3.0.3/src/main/resources/config/prod/main.properties
Editing the settings of the Steve server are not necessary for default operation. In case you do change the settings, you will need to recompile the SteVe server. Therefor you need to enter within a console (putty) under the folder /works/steve-steve-3.02/ the command
mvn package
Update 02/04/2021
{
"Günther" wrote that he had to execute the command "# java -jar target/steve.jar“ after changing the IP. Thanx!
}
The autostart of the SteVe service is managed by the file
/etc/init.d/steve
Should the path of the SteVe server change (i.e. due to new compilation of a new SteVe version), you will need to change the path also in the file /etc/init.d/steve. The SteVe service can manually be operated with these commands
/etc/init.d/steve start
/etc/init.d/steve stop
/etc/init.d/steve restart
A good "Swiss knife" tool for the Linux console (in putty) is the Midnight Commander. It is run by the command
mc
The whole system, database inclusive, uses the UTF character encoding. The keyboard layout is set to German - CH.
System updates can be done under Internet acces with the commands
apt-get update
apt-get dist-upgrade
But there is no real need to do so on a pure local system. It brings the danger that the SteVe server looses some dependencies and then also needs to be updated.
5. System recovery
There is no automatic backup of the system. Database backups can be done i.e. under Windows with the software HeidiSQL (Right mouseclick on the database -> Database SQL Export).
Should you need to completely reset the system, you need to proceed as under 1. Installation mentioned.
6. Files
The image: steve_raspi_image270918.gz (1,1 GB)
The HTML test file: simple simulator1.6.html (Right click -> Save target as ...)
The Certificate: steve.crt (Right click -> Save target as ...)
Here some more information about the image at Goingelectric (German): https://www.goingelectric.de/forum/private-ladeinfrastruktur/ladelog-mit-keba-zu-hause-lokaler-ocpp-server-t35340.html
Have fun ...